Wednesday 26 March 2014

New Home, New Baby

There's a saying New Home, New Baby and this is exactly what happened with Joe's family.  In the last post I shared a card I'd made for baby Joe's arrival but a few weeks before his appearance his family moved in to their new home which they'd built themselves.  This was their second build and, as Erik is a joiner, they had experience, knowledge and contacts in the trades to call on for this one.  It was all hands on deck right from the start as this photo shows.  Here's Erik, Ian and Olivia in full swing during the preparations.


This is the New Home card I made for them.


The little house topper was made using an original Sizzix red die and papers from the Cuddly Buddly downloads A Patchwork of Papers Blue and A Patchwork of Papers Green and a backing paper from the Fred She Said Blue Pansies download.  The shaded colours of the backing paper worked perfectly to create a skyline along with clouds cut using Joy dies and sponged with blue metallic ink.


The sentiment was created on the computer and framed using Spellbinders circle dies and layered on to a shape cut using a Sizzlits die.  Stitched borders were added for extra framing and punched and die cut flowers, ribbon. a gold brad and peel off dots were added as embellishments.


Before sending off the card I printed out the name of their new house and added it above the door on the topper.


Here's the new addition to the family in their new home.

Thanks for reading today
Liz xx 

Monday 24 March 2014

And Then There Were Three

Back in September I posted about a grand-niece Olivia and the card I had made for her birthday.  At the end of the posting there was a photograph of Olivia and her big brother Ian holding the scan picture of their baby brother or sister.  Well last month baby Joe arrived and this is the card I made for him.  It's cased from this card made at the start of the year but personalised for Joe.


This is a little gift tag made with the extra bits from the card.


This is baby Joe's first night home with his big brother and sister.


Thanks for reading today.
Liz xxx

I'd like to enter this card in the following challenges

Friday 21 March 2014

Just For You Purple Monochrome

Back again with another Just For You card using one of the Woodware large word stamps.  This one was for one of my school chums whose husband was a best man at our wedding almost thirty years ago.  (I recently posted about their daughter Claire's surprise engagement in New York.)  After receiving this card Linda phoned to say thank you and we had a lovely chat catching up on family news.  They've been in my thoughts this past week as sadly they lost their son due to a car accident ten years ago this month and last Sunday would have been his thirtieth birthday.

This is the card I made for Linda.


The patterned papers used for this one are from Pink Petticoat's Little Swirls design in the lilac colourway, Cuddly Buddly's A Patchwork of Papers Purple and the Nitwit Collection Promises.  Lilac grosgrain ribbon, purple metallic brads and a mixture of paper and fabric flowers were added as embellishments.  Dark purple thread was used to stitch an outline border around the panels.  Purple Encore Metallic ink was sponged on the scalloped edges of the card blank.


Unfortunately there are more of these Just For You cards to be posted as I really enjoy the challenge of putting together papers and embellishments in toning and contrasting colours around them.

Thanks for reading today
Liz xx

I'd like to enter this card in the following challenges
Seize the Birthday Challenge - Birthday Stitches
MilkCoffee Challenge - At Least 2 Flowers
Divas by Design Challenge - Flower Power
The Sisterhood of Crafters Challenge - Sentimental Journey
Paperminutes Challenge 313 - Sentiments
Bunny Zoe's Crafts March Challenge - Monochrome
Incy Wincy Designs Challenge - Monochromatic

Wednesday 19 March 2014

Another Special Male Birthday

The card in this post is a duplication of the ones in the previous post, Special Male Birthdays, but there is an extra special story about the recipient added at the end.  This version was for an uncle who celebrated his 80th birthday at the beginning of March.


The layout and papers used were the same as before with the addition of black grosgrain ribbon wrapped around the strip of card underneath the main toppers.


As well as celebrating his special "O" birthday Uncle Bob received a special award from Oban Celtic Shinty Club for his dedication to them over the years.  In 1997 my cousin Robert, who was a keen shinty player, died at the age of eighteen as a result of a car accident.  He was a keen shinty player and in his memory a trophy was donated to the club by friends and colleagues which is played for annually in a friendly match.  This took place on the 22nd of February this year and Oban Celtic kept the trophy at home.  It was at the trophy presentation that Uncle Bob also received his award.  As you can see in the photo below he was delighted for this recognition.


Thanks for reading today
Liz xxx

I'd like to enter this card in the following challenges

Monday 17 March 2014

Special Male Birthdays

There aren't too many birthdays amongst family and friends at the beginning of the year but this year there have been several males, who I don't normally make a birthday card for, celebrating landmark birthdays.  It was the Woodware large word stamp Happy Birthday which was used to make cards for these gentlemen and it was paper pieced in the same way that I've been using their Just For You stamp. 

The first birthday was for brother-in-law Stewart who lives in Norway but drives a removal truck usually between Norway and Spain and it was on one of these journey's that he celebrated his 65th birthday.


Blue card and patterned papers from the Cuddly Buddly download A Patchwork of Papers Blue were used to make this card.   The Happy Birthday stamp was stamped and embossed using VersaMark ink and Disco Black embossing powder from Stampendous.  It was then stamped and embossed on to two different patterned papers from the collection and alternate letters were cut from each patterned paper design and paper pieced on to the main stamped image.  Once completed the topper was embossed using the Cuttlebug Falling Snow embossing folder.  This welds the paper piecing to the card and adds texture which you can see in the picture below.  A stitched border using a black and silver mix thread was added to frame the sentiment before layering it up with patterned paper and blue card to make the main topper. 


The topper was attached to the card using foam pads to raise it over a strip of blue card and on to more layers of patterned paper and blue card.


The sixty-five was printed from the computer and layered on to circles cut using Spellbinders plain circle dies.  A VersaMark ink pad was dabbed on to blue card and then embossed using Stampendous Disco Black embossing powder to create a piece of black sparkly card to cut a circle from.  The only extra embellishments were the silver brads.

The second of these cards was for one of Ian's friends who was celebrating his 21st birthday.


The same papers and card were used to make this one with just a slight change in the layout and the use of black self adhesive pearls instead of silver brads.

The third special birthday was for a nephew who turned thirty on the last day of February and who just missed being a leap year baby.


 A mix of the two above cards came together for this one.  There's still another one of these cards to share but I'll keep it for another post.

Thanks for reading today

Friday 14 March 2014

Three Aunties

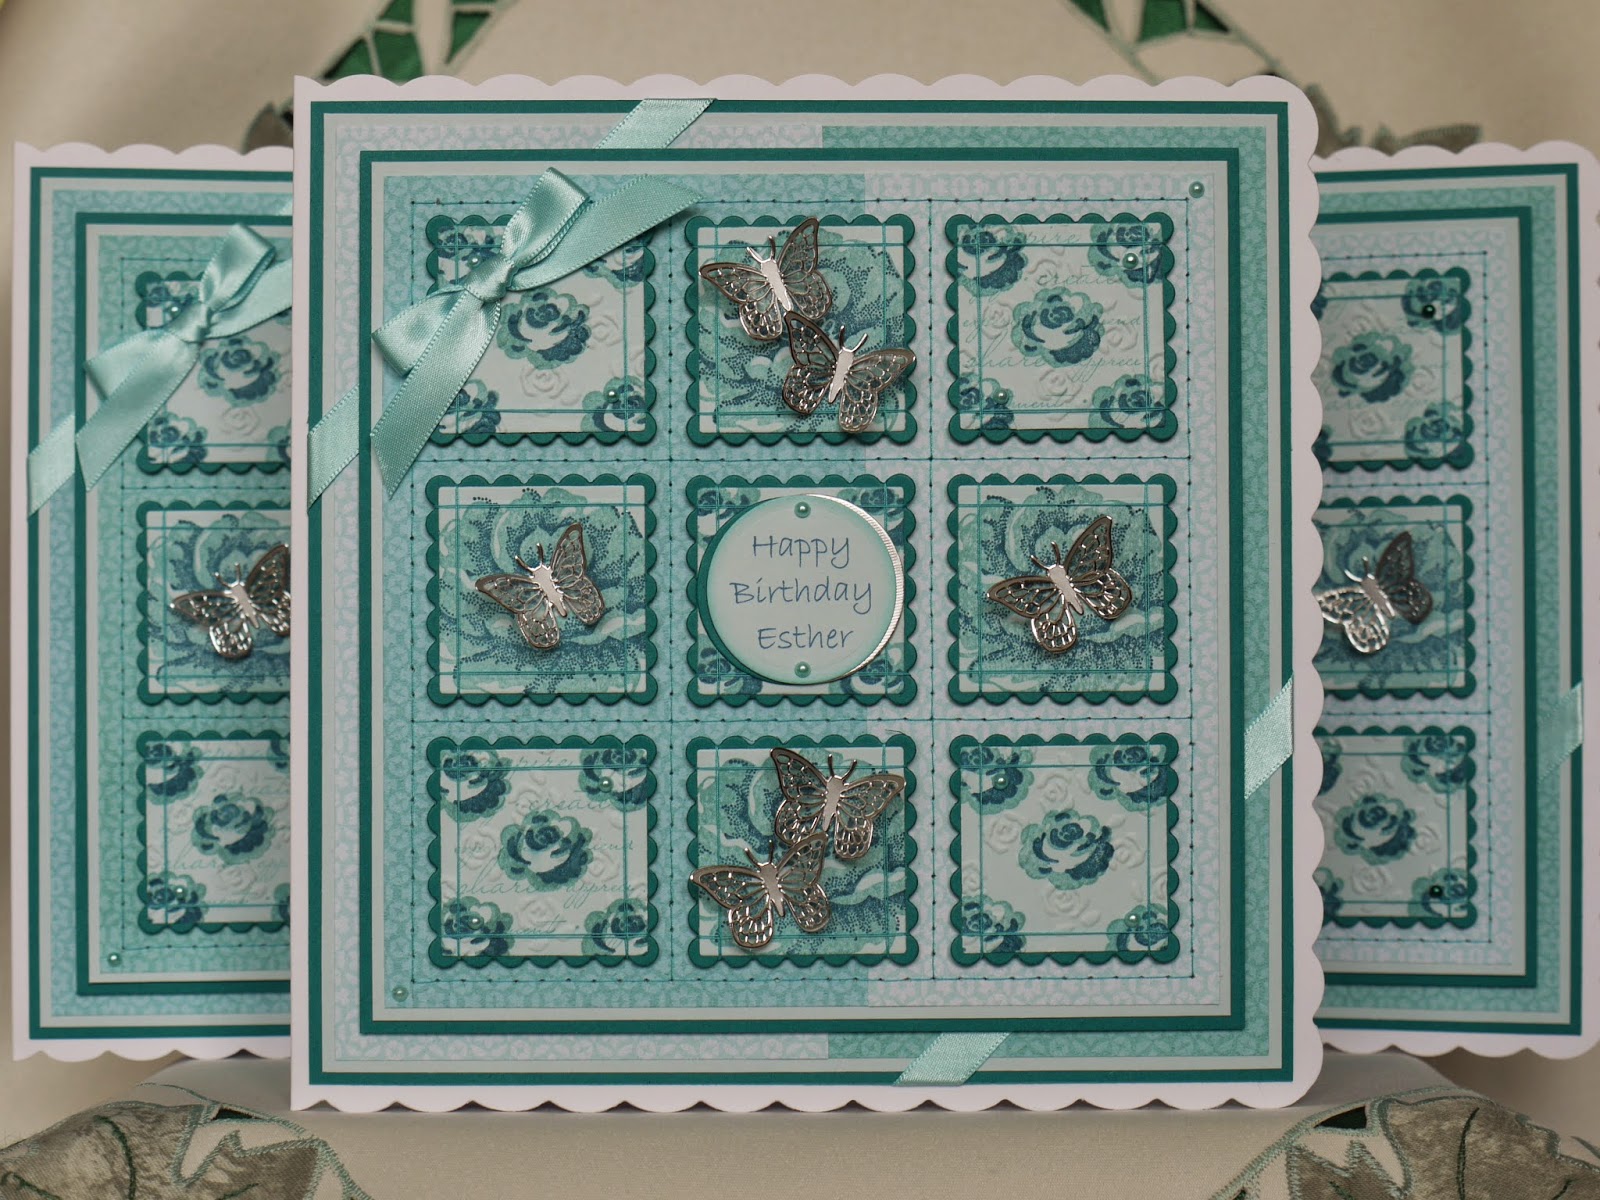
During November there are three uncles with birthdays but when February comes around it's the turn of three aunties to celebrate and it was back to my favourite squares layout to make cards for them. The colour scheme for their cards was based around Stampin' up's inks Island Indigo and Baja Breeze.  To find out how these cards are put together then check back to this post.


Matching up with the Stampin' up inks were patterned backing papers printed from the Nitwit Collection Snow Princess Solids, plain card from W Enterprises, satin ribbon from John Lewis, self adhesive pearls from The Hobby House and thread to stitch the grid for the square toppers.

Netta's card


Mary's card


Esther's card


Esther happened to be in Aberdeen the weekend before her birthday so we were able to meet up with her to give her her card.  With most of our relatives living in Orkney this doesn't often happen and the ladies at the local post office know me quite well now.

Thanks for reading today
Liz xx 

I'd like to enter these cards in the following challenges

Wednesday 12 March 2014

Angry Birthday

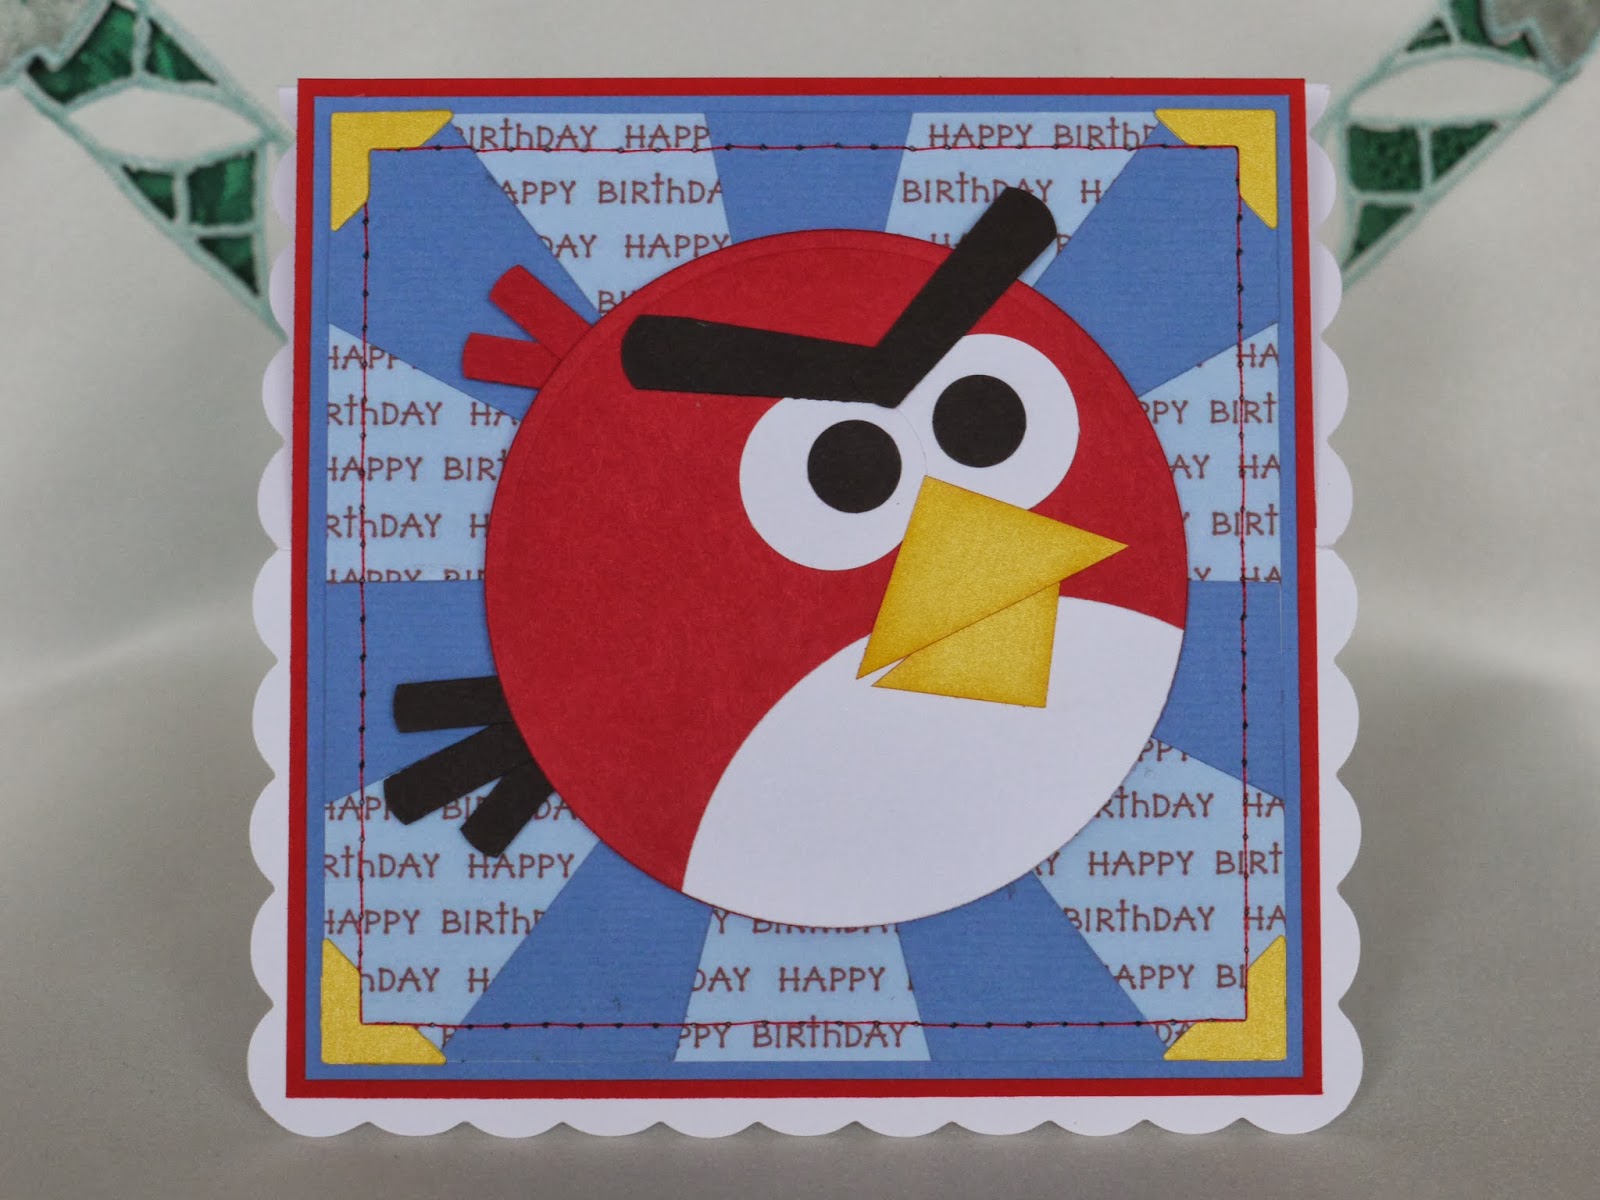
The first birthday card needed for the start of the year was for a grand-nephew who was to be eight.  I was completely stumped as to what theme to follow but had saved on to Pinterest an Angry Bird card I'd liked, which was big, bold and bright, so opted to case this card for him and this was the result.  The original card can be found here.


The body of the bird was made using Spellbinders circle dies and the eyes were punched using Stampin' up's inch and half inch punches.  Feathers and eyebrows were strips of card rounded at the ends using a circle punch and the beak was made from two different sizes of triangles cut diagonally from squares.  The edges of the beak were sponged using ink from a gold Promarker pen.

As well as red and blue card being used for backing layers a Happy Birthday backing paper was printed on pale blue card from the Cuddly Buddly download A Patchwork of Papers Red.  The rays were cut from blue card and added on top.  A stitched border and corners cut using a Quickutz die were added to frame the bird.


The base of the easel card was layered up to match the front with a sentiment being added which was printed from the computer and framed using Spellbinders labels 10 dies.  This was attached to the base using foam pads and placed over a bar of blue and red layered card.

The stoppers for the easel were punched circles with the number eight added which had been cut using a Quickutz die.

The verse was also printed from the computer and framed using Spellbinders labels 10 dies.


The only added embellishments on this card were the silver brads.  Not a piece of ribbon or bow in sight.

Thanks for reading today
Liz xxx

I'd like to enter this card in the following challenges

Monday 10 March 2014

Surprise Engagements

Not only was there a baby card to make at the beginning of the year there were also two engagement cards to make.  Just before Christmas a nephew proposed to his girlfriend and caught her totally unawares.  Although his home base is in Orkney Olaf works offshore and travels through Aberdeen to get there.  On one of these trips through Aberdeen he bought an engagement ring and then started planning the proposal.  He booked a guided tour of  St Magnus Cathedral and it's tower and it was whilst at the top of the tower looking out over Kirkwall that he proposed.  Here is a lovely photo of the two of them capturing that special moment.


I wanted to use this photo on their engagement card so along with the Nitwit Collection Prints Charming this is the card I made for them.


I'm still quite a novice when it comes to creating something digitally but enjoy the challenge of placing, sizing, orientating and then personalising with text.  It never works first time, and there are usually a few print outs before the end result is achieved, but once the base is created and saved it's there for using on another occasion.


To add depth to the card the front topper was created separately from the card base, backed with blue card and attached using foam pads over a strip of the same blue card wrapped with thin green ribbon.  The element LOVE was printed out again and decoupaged so this added a few layers to the card and to add an extra frame a border was stitched around the topper.  A green ribbon bow, green self adhesive pearls, corners cut using a Quickutz die and a double layered banner cut using a La La Land die were added as embellishments.  Hearts left over from the banner were added to the corners.


Elements from the Prints Charming collection and  die cut hearts were also used to decorate the insert.

 
On the reverse of the card I used the photo from their engagement day and the punch feature of My Craft Studio to catch the happy couple in the heart shaped frame.  They are now busy preparing for a wedding on the 1st of November in St Magnus Cathedral where Olaf proposed.

...

The second engagement card was for the daughter of our best man who got engaged last September but we only found out their happy news when cards were swapped at Christmas.  If you look back to this post you'll find out a little about Claire and the fact that she appeared on the programme The Cube and won £10,000.  During the programme Philip Schofield asked Claire what she might use any winnings for and she mentioned a wedding and when the camera went across to her boyfriend his expression implied that this was news to him.  Unbeknown to everyone he had already started plans to make a surprise proposal which he put in to action on the first of September.  Right up until they reached the airport, supposedly heading off for Florida, Claire had no idea that she was being taken to New York to be proposed to.
 
For Claire and Mark's card I used the same card base as I used for Olaf and Lana but changed the text to personalise it for them.


These two lucky girls will have lovely memories of their proposals.  Well done the lads.

Thanks for reading today

Thursday 6 March 2014
New Year, New Baby

The first card of 2014 was a baby card.  This was an order and, although the baby was born at the beginning of December, the card wasn't required until the start of the New Year.  This suited me fine as there wasn't much spare time to make one amongst the Christmas and birthday cards needing to be made and once those are finished all crafting stash in the dining area gets banished to the garage over the festivities.  


As well as using lemon and blue card stock patterned papers from the Cuddly Buddly download A Patchwork of Papers Blue and papers and elements from the Forever Friends Collector's Edition CDs were used.  Yellow and Blue stitching were added around the layered card and papers to add an extra frame.  The sentiment on the front was created on the computer and punched and layered using Stampin' up's plain and scalloped oval punches.


Behind the front of the Z fold card details about the baby's arrival were printed from the computer and then die cut and layered using Spellbinders Labels 10 dies.  The little duck elements and backing layers were punched out using Stampin' up's one inch circle punch.


A lined section for the sender's message was created on the computer using the full stop key and this was also die cut and layered using a Spellbinders Labels 10.  On the opposite side a verse printed from the computer was framed and layered using Spellbinders plain circle dies.

Embellishments used on this card were yellow brads, lemon grosgrain ribbon and blue self adhesive pearls.  Large and small corners and buttons cut using Quickutz dies were also added.

I've recently just cased this card for the arrival of a grand-nephew but I'll share that one in another post along with photos of Joe and his big brother and sister.

Thanks for reading today