Sunday 13 July 2014

Lady Folk Birthday and Anniversary for a Friend

One of my friends celebrates her birthday and anniversary on the first and second of July so I continued using the Lady Folk Nitwit's 
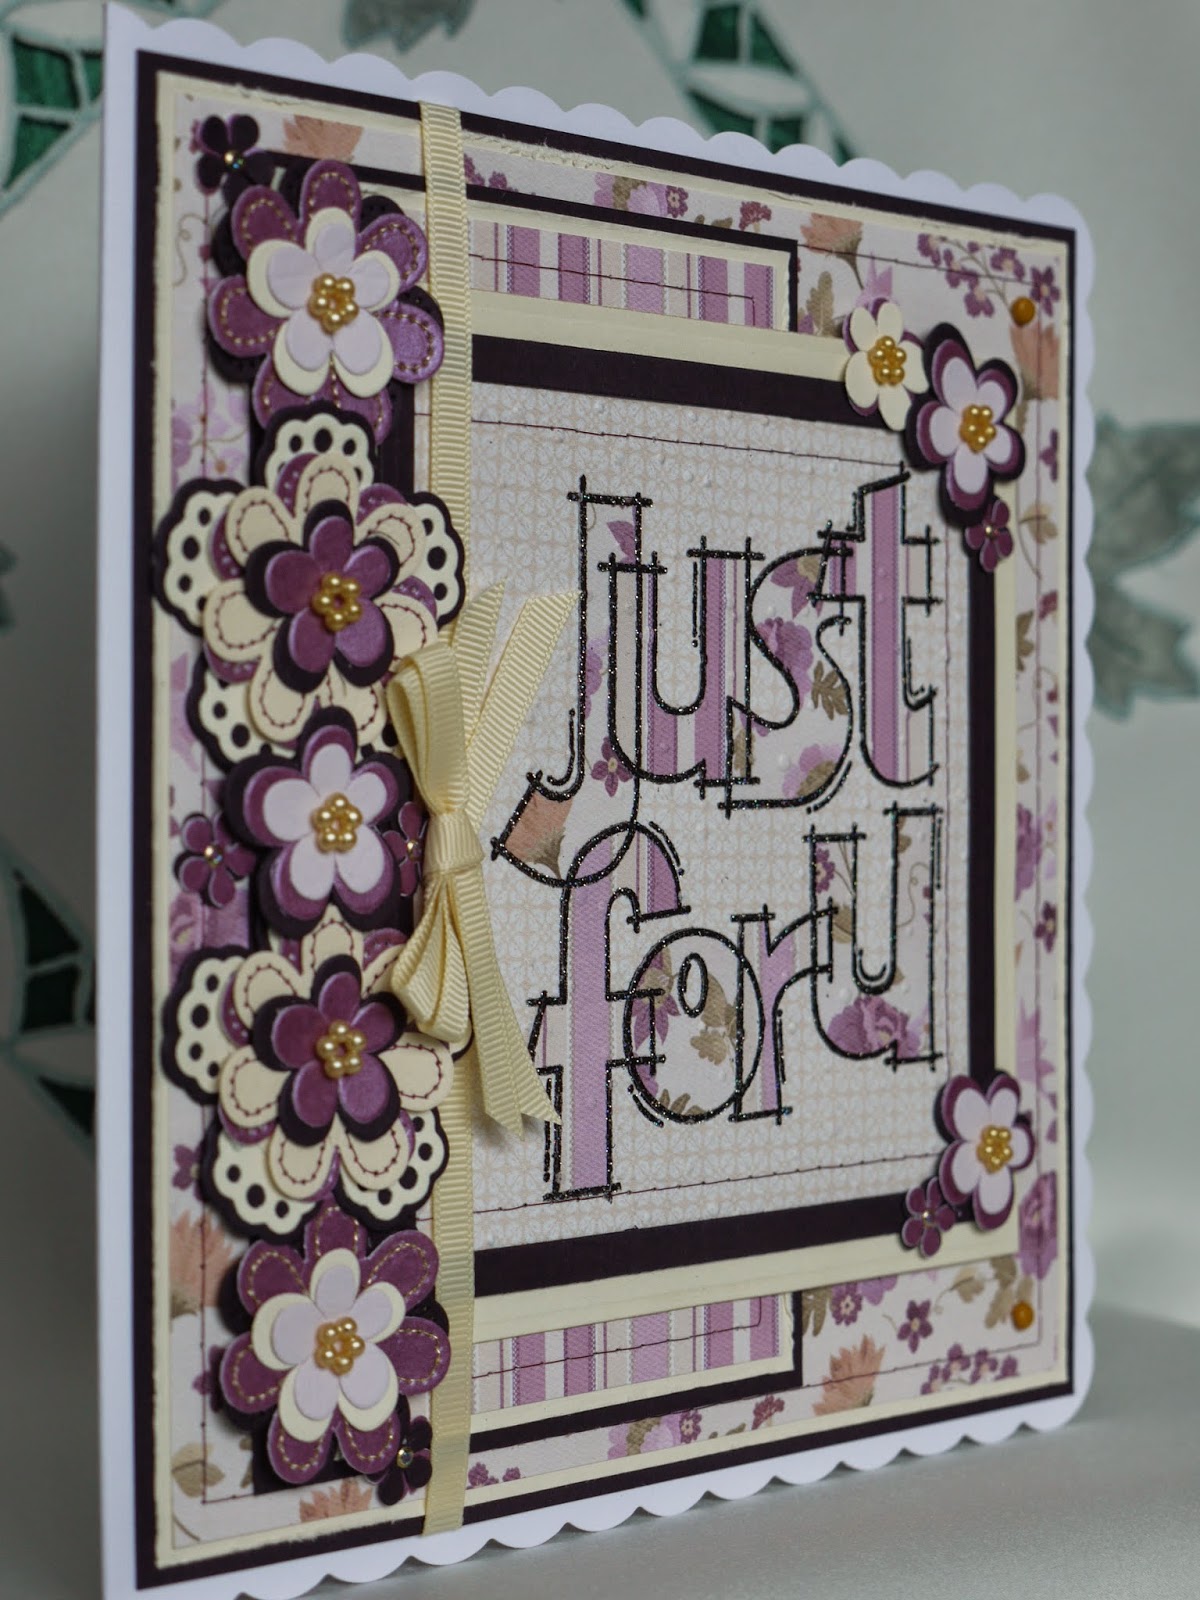
Collection to make cards for each celebration.  The birthday card was cased from the one in the previous post using the Just For U stamp from Woodware.  Flat backed pearls in the centre of the flowers instead of beaded flowers was the only change made to the card.


On the inside the insert was decorated with one on the elements from the collection.


For the anniversary card the backing layers used were the same as those used for the Pearl Wedding Anniversary cards I made recently and the heart topper was replaced with layered oval die cuts using Spellbinders plain, scalloped and floral oval dies with a verse printed on the top layer.


Heart die cuts with self adhesive pearl heart embellishments from Hobby House along with the couple's initials were added to personalise the card.


The two cards together.


Thanks for reading today
Liz xxx

Wednesday 9 July 2014

Lady Folk and Just For U Combo

Recently I was asked to make cards for two Aunts who were to become 101 and 104 and for the 101st birthday I went back to the Just for U stamp and layout using papers from the Nitwit Collection Lady Folk.


Plain card in toning colours were chosen for the backing layers and the flower embellishments.  The Nitwit Collections are ideal to use with all their matching papers in colour and design.

The flower embellishments were made using a mixture of Marianne ribbon dies, layered flower dies and stitching dies with gold beaded flower embellishments added to their centres.  The little flowers were punched and double layered using the X-cut small flower punch and have crystal dot peel off centres.


The Just for U was stamped and embossed on to one of the subtle patterned backing papers using VersaMark ink and Disco Black embossing powder from Stampendous.  It was then stamped and embossed on to two of the bolder patterned papers from the collection.  Alternate letters were cut from each patterned paper design and paper pieced on to the main topper.  The topper was then dry embossed using the Cuttlebug Falling Snow embossing folder.  This welds the paper piecing to the card and adds texture which I hope you can see in the picture.  A stitched border was added before the topper was framed and layered using square Grand Nestabilities dies.


Although there was no reference to the age of the Aunt on the outside of the card one of the elements from the Lady Folk Collection was resized using My Craft Studio and had the age added to it to make up the insert for the card.

 
Hopefully this lady had a great day on reaching this milestone age.
Thanks for reading today
Liz xxx

Monday 7 July 2014

Double Pearl Celebrations

Two crafting friends and their husbands, Rhona and Susan, celebrated their Pearl Anniversary recently and these are the cards I made for them using the Nitwit Collection Lady Folk along with the Marianne Anja Filigree Heart die set.  The first card was for Rhona and Alistair.


Patterned papers and elements from the Lady Folk Collection were resized and flipped using the My Craft Studio programme to build up the backing layer and personalise it with their initials.


Along with cutting out the heart die layers extra layers of the solid heart shapes were cut to add behind the open hearts to build up the topper and add colour contrast.  Lots of self adhesive pearls in different sizes were added to the heart topper.


A stitched border was added to the printed backing to add an extra frame and added to the corners of the stitching were paper roses and rose buds in colours to match the patterned papers along with more pearls.  Gold satin ribbon wrapped across the card and added as a bow were also added to the card and this completed Rhona and Alistair's card.

Having saved the layout I only needed to change the initials to print out the backing layer for Susan and George's card.


On the inside of both cards more elements from the Lady Folk Collection were used to decorate the insert and a verse was added over the top with a message printed underneath.


Thanks for reading today
Liz xxx

Saturday 5 July 2014

Last Origami Box

This is the last origami box I made and this one too went to Orkney full of fudge with Alan.  An Auntie had recently had health problems so I sent this one home to her to enjoy whilst she recovered from surgery along with a bought get well card.  I'd intended to make one to match the box but time ran away from me.  I get such a guilty feeling buying a card now when I've got all these card making bits and pieces around me.

To find out how to make this origami box base then follow the following link to find an excellent video tutorial.  http://www.card-making-magic.com/origamiboxtutorial.html.


The base of this box was made from a sheet of 12"x 12" double sided patterned paper from Stampin' up.  The lid and sides of the box were decorated using Marianne stitching dies, layered flower dies and the English Rose die which are my favourite ones at the moment.  The small flowers were punched using an X-cut small flower punch with peel off stickers added to their centres.  A few self adhesive pearls and satin ribbon were the other embellishments.


Dark and light shades of purple card were used for the layers on the lid, the lining layers inside the box and to cover the base of the box.  Nestabilities and the first die from the Grand Nestabilities Labels 1 sets of dies from Spellbinders were used to cut these layers.  The lace edges on the triangle flaps were made using a Stamping up border punch and pearlescent card. Nestabilities circle dies were used to make the holder for the ribbon handle.


Altogether I've made six of these boxes and five of them travelled up to Orkney with Alan on his visit back in April.  I managed to capture a photo of them all together before he left.


Thanks for reading today and enjoy your weekend.  I'm off to catch up with some crafting buddies today to make shaker cards.
Liz xxx

Wednesday 2 July 2014

Happy Elaine

No crafting from me in this post as I thought I'd share another happy picture of Elaine when she invaded my crafting space last Friday.  It was the first day of her holidays and she'd brought out her scrap book and bits and pieces to add another page to her book.


It was a Christmas page she was building up with photos, wrapping paper, a tag and even practice pieces I'd stamped, coloured  and cut out but hadn't used.  


Once she had finished the page she turned it over and the look on her face said it all.  Yes, the book had been upsides down and what was worse was that the other side of the page had a layout on it too.  She decided to pull the pieces off the other page and then the page was cut out, trimmed and attached to the next page in the book.

I think we've all done this at some point and I'm sure that it'll be something she'll check the next time she comes to do a layout.

Elaine and Andy are in Orkney at the moment and on the first day of their holiday she found a Primula scotica plant in full bloom.  She's been trying to find this plant in bloom for some time but on each visit north the flower had yet to bloom or had already bloomed.  This year the timing was just right and here's another happy picture of her with the elusive plant.


Thanks for reading today and I hope to have some more happy photos of her to share soon.
Liz xxx