Monday 30 September 2013

Baby Evie

On the 17th of September baby Evie was born on the eve of her big brother Finlay's fourth birthday.  Luckily Finlay was hoping he'd get a baby sister so he had an extra special birthday present to wake up to.  The day was made even more special as his Mum Lianne and his baby sister came home from the hospital to celebrate with him.

It seems no time since Lianne was Finlay's age and I still remember when, at the age of five, she visited on our Elaine's first birthday and the parcel she brought had been wrapped in white paper decorated with her drawings.  Lianne's followed a creative path since then graduating from Robert Gordon's University with a BA (Hons) Design and Craft, Textile Design to go on to interior design for a local company and now has her own Wedding Stationary Company ViVi Paperie which she can fit around being a Mum.

This is the card I made for baby Evie.


The images and papers for this easel card came from the Nitwit Collections Tickled Pink and Thimbles 'n Threads and were sized and printed using the My Craft Studio Professional graphics programme.  The It's a Girl paper, verse and sentiments were created on the computer.


The main image was framed and layered using Spellbinders plain and scalloped nestabilities dies and the smaller images were punched and layered using a 1" circle punch.  Martha Stewart's Doily Lace border punch was used to add decorative edges to the layered strip behind the main image.  The lace corners were cut using a Quickutz die.


The button stoppers for the easel card were embellishments from the Tickled Pink Collection and were punched out using a 3/4" circle punch.  The verse, the frame and layers for the name topper, the greeting on the back and their backing layers were cut using Spellbinders Labels 10 dies.  The letters for Evie's name were cut using Quickutz dies and shadow layered using shades of pink card. My usual additions of pearls and ribbon were also added.


The back of the card also had punched embellishments added.  To keep the card protected I made a box for it printing out another of the patterned papers to make the lid.


Here's a picture of baby Evie at home on her first day in the world


and this is Finlay with his birthday cake.


This is the card I made for Findlay which you can find out about in this post.


Thanks for reading today
Liz xx

I'd like to enter this card in the following challenges
That Craft Place Challenge - Baby


Friday 27 September 2013

Andy's Birthday

It was Elaine's boyfriend's birthday this month and he was celebrating a special "0" one.  Although she bought him personal presents she concentrated more on arranging for Andy to achieve a couple of items on his bucket list and also to arrange two surprise gatherings, one with friends and another with family.

The first item off the bucket list was horse riding and here's a picture of them both on their mounts.


The second item was handling birds of prey and they went to the Huntly Falconry Centre for this experience.  After a week of Elaine worrying about the weather they had a fantastic time and even though it was a murky start to the day the sun shone before it was time to leave.


Unknown to Andy the day before his birthday Elaine had arranged for friends to come up from Newcastle and through from Inverness for an afternoon of cycling with some of them, followed by a meal at night with all of them.  Below is a picture of the cyclists ready to set off around Kirkhill Forest track.


On his birthday it was a surprise lunch with his family who travelled through from Hamilton and Dundee.  They all played along with the arranged surprise as his Mum had brought through his present earlier in the week when she came to house sit, his Dad called him at half past nine to wish him happy birthday and his sister sent a text.

Elaine did really well to make sure Andy had a birthday to remember and I think she succeeded as apparently he grinned all weekend.  This is a lovely picture taken of the two of them on his birthday.


Before signing off I'd better share the card I made for Andy.


To find out about the materials used to put his card together then follow this link.  The number 40 was made using clear Papermania number stamps.  Having used the Woodware 18th and 21st stamps to make birthday cards this year I then invested in a set of clear Papermania number stamps so that the same effect could be created on a card for any age.  It's a great set of stamps to have if you just want to focus on the age or if you're not sure what the person's particular interests are to personlise their card for them.  The 4 and 0 stamps were stamped using Versamark ink and then embossed using Stampendous Disco Black embossing powder.  The number 4 was stamped and embossed first and then, using Stampin' up's stampamajig to help with positioning, the 0 was stamped over the top.  Having an embossed outline makes it easier to keep the glue inside the number outline when it comes to adding glitter. Once this had set the forty was die cut using a square Spellbinders die and the insides of the numbers were filled with silver glitter.

After weeks of planning and scheming I think Elaine certainly succeeded in making Andy's birthday one to remember.

Thanks for reading today
Liz xx

Wednesday 25 September 2013

Birthday Card for Auntie Liz

In my family, and Alan's family, there are a few Elizabeths and when one of my cousins was a little boy he decided that our auntie and myself should by Auntie Liz and LizLiz.  He was born just nine days before Auntie Liz married and it's hard to believe that he's now been a grandad for four years and that one of his family gets married next weekend.  It must have been an exciting time for my grandparents this time forty-three years ago as during a period of six weeks three grandchildren were born and their youngest daughter got married.  It certainly was an exciting time for me as having been an only child for eleven and a half years I then had a baby sister.

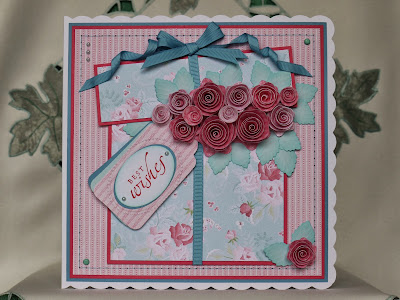
On the 11th of September it was Auntie Liz's birthday and I went back to the box of roses to make her card.  

 
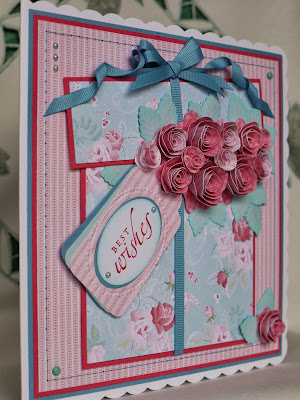
The patterned papers for Auntie Liz's card were from the Nitwit Collection Romance and Roses which were a good match to Stampin' up's melon mambo and marina mist cardstock.  There are some lovely papers and elements in this collection.  The box of roses fits on an 8"x 8" scalloped card and is raised up on foam pads.  The parts of the lid which don't overlap the box are on double layer foam pads.
 
Rolled roses made using the Marianne die English rose are still my favourite embellishments to use at the moment and these ones were cut from card printed on both sides with two of the papers, one dark and one light patterned, from the Romance and Roses collection.  

 .
The leaves for the roses were punched using an X-cut beech leaf embossing punch and then  had their edges sponged with VersaMagic chalk ink in sea breeze.
 
An original Sizzix red die was used to cut the gift tags for the box and the top tag was embossed using one of Stampin' up's textured impressions designer frames.  The sentiment set in the middle of the frame was stamped on to white card using a stamp from their Sincere Salutations set and melon mambo ink. It was then punched out using their extra large oval punch and around the edge sea breeze ink was sponged.
 
 
A border was stitched around the card and my usual embellishments of pearls, brads along with Stampin' up's Marina Mist grosgrain ribbon were added.


This is the last of the box of roses cards I've made but having bought some more Nitwit Collection digital kits in their recent sale it probably won't be long before I'm trying out the different papers to make up another box.  At our Crafting Bee yesterday Anne was making two boxes of roses cards in pink tones which were lovely.  It's certainly something you seem to get hooked on.

Before signing off I'd like to thank Chris for becoming my latest follower.

Thanks for reading today
Liz xx

Tuesday 24 September 2013

Cake Fundraiser

Last week Alan's work held a bring and buy cake fundraiser to help a local boy who is the classmate of another member of staff's daughter.  Adam Walker has been diagnosed with cerebral palsy and since being diagnosed his parents have researched an operation called selective dorsal rhizotomy (SDR) which is carried out in the St Louis Children's Hospital, St Louis, Missouri.  Adam has been accepted for SDR by the hospital and is described as an excellent candidate for the surgery.  To cover the costs of the operation, travel and accommodation they need to raise £50,000 and so Adam's Aim has been set up.  If you'd like to know more about Adam then click on this link - Adam's Aim


This was my eventual contribution for the cake table.  The first batch of cupcakes had to be rejected as I forgot to adjust the temperature for the fan oven and, although not burnt, they were well cooked and are now in the freezer waiting to be used in trifles instead.


I've been enjoying the baking shows on Create and Craft and have bought some moulds and cutters with the intention of trying to copy some of their ideas and this gave me the opportunity to try them out.  The roses were made using a silicone mould I bought from an eBay seller. It was so easy to use and gave a brilliant finish.
 

Hope this has made your mouth water.  The event was successful and on the day they raised £182.  Pounds out of the pocket and on the waistline as there were so many cakes brought in that they had enough for two days of treats.

Thanks for reading today
Liz xx

Saturday 21 September 2013

Thank you

Back in July Ian celebrated his twenty-first birthday and this is the batch of thank you cards I made for him to send to friends and family who sent him gifts.


The photo on the front was scaled down and printed in greyscale from a photograph taken of him on the day.  Stampin up's large oval punch and a frame embossing folder was used to create a frame from white leather effect card.   The corners were then punched with a Woodware corner notch punch and black thread wrapped around the frame.


Black, silver mirri and grey parchment cardstock were used for the different layers of the card.  The twenty-one patterned layer was created by stamping a Personal Impressions stamp on to black card with Encore silver metallic ink.  Stampin up's stampamajig was used to help with the positioning of the stamp so that the numbers could be seen along the border.


Black grosgrain ribbon from Stampin' up was used to make a bow and to wrap around the bottom layer of the card and then the photo topper was attached using foam pads.

Thanks for reading today
Liz xx

Thursday 19 September 2013

Amanda's Wedding

On Saturday Carol's daughter Amanda got married.  Carol is our Tuesday Crafting Bee host and as well as having been involved in the organsation and the preparations in the run up to the big day she had also made all the stationery for it.  There's been no time for crafty play as invitations, menus, favour boxes, small gift boxes, table signs and planner and more all had to be made.  However all efforts were well worth it as the wedding went off perfectly, Amanda looked stunning and the sun even shone.  

This is the card I made for Amanda and Kenny and the colour scheme and ribbon choice was based around the colour of the bridesmaids' dresses and the tartan of the grooms kilt which was Modern Pride of Scotland.  This ribbon had also been used on their stationery.  The script patterned papers are from the Nitwit Collection Always & Forever printed in greyscale and also a textured effect backing paper from the Joanna Sheen CD Secret Garden.


 Shades of plum cardstock and the patterned paper were layered up to make the backing panel for the cake and a border was stitched around it to make a frame.
 
The cake tiers of the wedding cake topper were made from rectangles of Crafter's Companion centura pearl card which then had their two top corners rounded before being embossed using a swirls embossing folder. The pieces were backed on to the darker plum card to leave a quarter centimeter border around the sides and top.  Tartan ribbon was wrapped around each piece before they were attached to each other.
 
Foam pads were used to attach the cake to the backing panel and ribbon bows were added to each tier.  The hearts at the top of the cake were cut using Spellbinders plain and scalloped hearts dies and the couple's initials were added inside the hearts using peel offs.  The double layered trailing ivy was cut using a die from the Marianne Creatables Ivy die set LR0206 and attached to the ivy are 10mm paper roses from Wild Orchid Crafts.
 
A stamp from the Stampin' up set Petite Pairs was used to make the sentiment.  It was stamped with black Memento ink and then punched out and layered using Stampin' up's plain and scalloped oval punches.  Small hearts punched out using a Woodware punch were added to the corner of the topper.
 
 
Paper roses, rosebuds, self adhesive pearls and gems and small buds from a heather spray were added to the trailing ivy to decorated the cake.
 
 
Die cuts made using the Precious Hearts dies from Memory Box were used to decorate the panel behind the front of the card.  The couple's initials and marriage date were added to the hearts.


Attached to the inside was a printed verse which was framed using Spellbinders grand nestabilities circles dies.  On the opposite flap the couples names and date of marriage were framed using Spellbinders heart dies.  


I went along to see Carol and her family leaving the house and managed to take a few photos. 

The carriage awaits.


Amanda steps out in to the sunshine and the sun wasn't the only thing beaming.


Carol and her three beautiful daughters


Amanda with a very proud Dad


Finally it's time to go

 
Here's a link to an edited version of Amanda and Kenny's wedding video.  If you decide to view then I'd suggest to grab a tissue first.

Thanks for reading today
Liz xx
 

Tuesday 17 September 2013

Fifteen and Lippy

It was Rhiannon's fifteenth birthday on Sunday and we know Rhiannon's family because her Grandma was a neighbour of ours when we first moved to this street and then when our Ian was born Rhiannon's Mum Sarah used to take him out in his buggy. When it came to making Rhiannon's card I knew exactly what backing paper I was going to use.  She's a really pretty girl who loves her lippy and when I found a sheet of black card with foiled pink lips on it in the DCWV Rock Star pad I knew whose card I'd use it on.

Earlier this year Rhiannon's Dad entered her in a competition to become The Face of The Edge Hair and Beauty Salon in Inverurie and she won.  Below is the promotional photo taken after her win.

    
This is the lippy birthday card I made for Rhiannon.


I'm definitely liking the nine square grid layout for cards and used it again for this lippy card.  The little toppers were die cut from black, white and pink card using plain and scalloped nestabilites dies.  The plain squares were embossed using a Darice lips embossing folder before being attached to the scalloped squares and then black or pink thread was wrapped around the topper.  Lips and lipsticks were die cut from pink glitter card and black cardstock and added to the toppers.   
The sentiment in the middle was created on the computer and die cut and layered using nestabilities plain and scalloped circles dies.


The backing panel for the squares was made from layers of black, pink and patterned paper from the Cuddly Buddly download A Patchwork of Papers Pink.  A grid of nine five centimetre squares was stitched on to the top layer using black and pink thread.  The small square toppers were attached to the centres of these squares using foam pads.  Foam pads were also added to the back of the completed panel before it was attached to the card.


The bottom tier was also made up from layers of black, pink and patterned paper with a pink ribbon wrapped around two of the corners.  A pink bow was added to the top tier.  Other embellishments added were self adhesive gems and pink corners die cut form pink card using a Quickutz die.

Yesterday Sarah posted a picture of the cupcakes she'd had made by Tasty Little Cupcake for Rhiannon's birthday.  What a talented person made these and they look scrummy.


Hopefully the birthday girl had a lovely day.

Thanks for reading
Liz xx

Monday 16 September 2013

Eighteen at Last

At the start of September my cousin's daughter turned eighteen and she couldn't wait for the day to come.  Nicola is a lovely girl and the first thing you notice about her is her lovely smile and bright eyes.  At the moment she's working part time in a local nursery whilst studying for an HNC in Early Education and Childcare.  

To make Nicola's card I went back to the Woodware 18 stamp set.


The 18 was stamped on to the positive lilac Little Swirls paper from Pink Petticoat using VersaMark ink and embossed using disco black embossing powder from Stampendous.  Once this had set then the eighteen was die cut using a square Spellbinders die and the inside of the numbers were filled with art glitter glue and lilac glitter.  A border was then stitched around the topper to frame the eighteen.

 
The card was put together in three tiers with the two top tiers raised on foam pads.  On the bottom one there are layers of lilac and silver textured card and the positive silver Little Swirls patterned paper.  Corners were added on top made from Happy Birthday paper printed from the Cuddly Buddly download A Patchwork of Papers Purple on to lilac parchment card from Southfield Stationers.  A border was then stitched around this to match the 18 topper.

The second tier has a scalloped square cut from lilac pearlescent card and layered on top of this is silver textured card, the negative lilac Little Swirls paper and the Happy Birthday paper.  Corners of silver mirri card embossed with a Darice keys embossing folder were added to this layer.
The 18 topper layered on to lilac and silver mirri card was the third tier.


My usual embellishments of ribbon and brads were used with the addition of two silver keys.  A message created on the computer was added to the inside of the card.


Here's a lovely picture of the birthday girl.


Wishing her another successful year at college.

Thanks for reading today
Liz xx